Tuesday, April 15, 2014

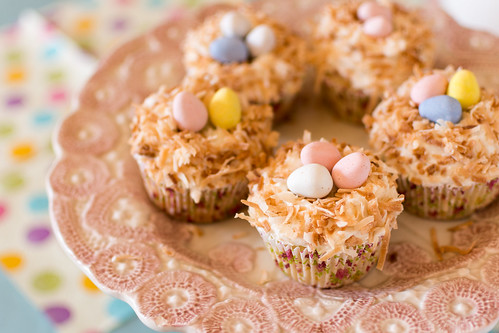
Coconut Bird Nest Cupcakes

Coconut Bird Nest Cupcake 

This past weekend I had a totally adorable Easter/Spring party complete with an Easter Egg Hunt! I'm sure it was almost as much fun for my neighbors to watch a bunch of grown ass adults run around the yard looking for eggs as it was for us to find them. More fun than it was being a kid though because I get to swear at my friends and eat as much candy as I want - and no one can stop me!
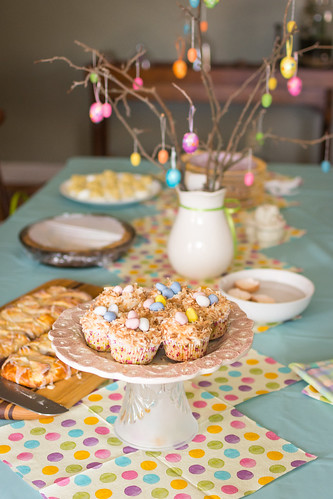
  
Easter Party!
Look how CUTE!!!

After not baking for over a month I was pretty eager to flex my culinary muscle. There was quiche, deviled eggs, rainbow fruit on a stick, biscuits, cream cheese strawberry rhubarb danish, and of course these sweet little coconut bird nest cupcakes! 

Earlier in the day, before I had tasted one, I was lamenting to my friend that I have yet to find a vanilla cake recipe I really like, and that they all tend to have a heavy, cornbready flavor and texture to me. Despite the fact that these are coconut cupcakes, I think this will be my go-to vanilla cake recipe as well! The coconut flavor is mild enough that you might miss it if not for the addition of some shredded coconut (if you want it to be more prominent, I suggest adding a touch of coconut extract to the cake, frosting, or both). The texture, though, is perfect - light, but not too delicate, and moist without being greasy. I only wish my carb-deprived belly could have fit more!
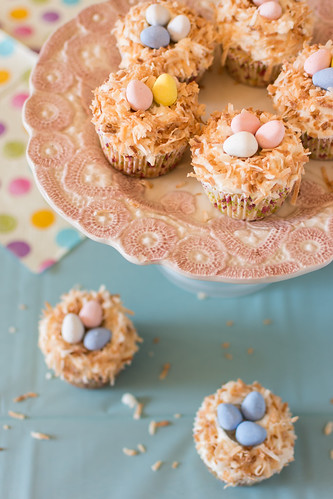
Coconut Bird Nest Cupcake

Coconut Bird Nest Cupcakes
Makes 18-20 cupcakes

For the reduced coconut milk:
2 13-14oz cans unsweetened coconut milk

For the cake:
2 cups all purpose flour
2 1/2 tsp baking powder
1/2 tsp salt
3/4 cup unsalted butter, room temp
1 1/3 cup sugar
3 large eggs, room temp
1 cup reduced coconut milk, room temp
seeds scraped from 1 vanilla bean
(coconut extract to taste, optional)

For the frosting:
1 cup unsalted butter, room temp
2 1/2 cups confectioner's sugar
1/3 cup reduced coconut milk, room temp
2 Tbsp coconut rum
seeds scraped from 1 vanilla bean
1/8 tsp salt
(coconut extract to taste, optional)
1 1/2 cups sweetened coconut, lightly toasted
1 8 oz bag Cadbury mini eggs

1. For the reduced coconut milk: Pour coconut milk into a deep, medium sized saucepan and bring to a boil over medium high heat. Reduce heat to medium-low and simmer until reduced to 1 1/2 cups, stirring occasionally, about 30-45 minutes. Remove from heat and cool completely. 

2. For the cupcakes: Position rack in center of oven and preheat to 350F. Line a muffin tin with paper liners. Whisk the flour, baking powder and salt in a medium bowl.

3. In the bowl of a stand mixer, beat the butter with the paddle attachment until smooth, then add the sugar and beat on medium high speed, scraping the sides of the bowl occasionally, until light and fluffy, about 2 minutes. Add 2 eggs, one at a time, beating well after each addition and scraping down the sides of the bowl, then beat in the vanilla bean seeds and remaining egg. Add half of the flour mixture and mix on low just until lightly blended. Add the 1 cup reduced coconut milk and mix just until blended. Finally, add the remaining flour mixture and mix until blended. 

4. Divide the batter among the prepare muffin tins and bake until cupcake tops spring back when gently touched and a cake tester inserted in the center of a cupcake comes out clean, about 20 minutes. Transfer cupcakes in tins to rack and cool for 10 minutes before removing from tins to the rack to cool completely. 

5. For the frosting: In the bowl of a stand mixer using the paddle attachment, beat the butter until smooth. Add the confectioner's sugar, reduced coconut milk, rum, vanilla bean seeds and salt and beat on medium low until blended, occasionally scraping down the sides of the bowl. Increase speed to medium high for a minute until light and fluffy. 

6. To decorate, top each cupcake with 2 tablespoons or so of frosting, and spread the frosting around so there is a small indent in the frosting in the center of the cupcake, almost exposing the cake. Gently press the toasted coconut around the frosting, then arrange your eggs in their "nest." Enjoy!


Thursday, February 13, 2014

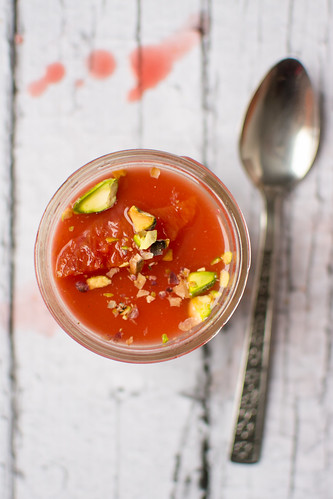
Blood Orange Panna Cotta

Blood Orange Panna Cotta

It's Valentine's Day eve. Maybe you're procrastinator and had grand ideas about a romantic dinner for your sweetie but never actually got around to planning it. I'm sure you're in good company. 

I'm a procrastinator too. Normally around this time of year I like to make all sorts of dumb little Valentine's Day baked goods and crafts. I don't know why. I'm not crazy for the manufactured love of V-day. Maybe it takes me back to my childhood where all the little twits in my class had to pretend to be nice to me for one day and give me a card.. suckers.

This year however, I did nothing. I kept putting it all off, and with snowstorm after snowstorm, mid-February sort of just snuck up on me. C'est la vie. I did make these panna cotta though, and the good news is you too can STILL make these for tomorrow! Hell, you can put it off for another 12 or 16 hours if you want and still have them ready for V-day evening. Hooray for procrastination! 

Blood Orange Panna Cotta

Blood Orange Panna Cotta
(makes 12-14  4oz mason jars, or about 6 cups)

For the Panna Cotta:
3/4 cup sugar
3/4 cup milk
3/4 cup heavy cream
seeds of 1 vanilla bean, pod reserved
1 1/2 tsp fresh ground cardamom
2 tsp blood orange zest
1/2 tsp salt
3 cups Greek yogurt
3/4 cup blood orange juice (about 3-4 oranges)
4 tsp unflavored gelatin

For the Blood Orange Syrup:
3/4 cup blood orange juice (about 3-4 oranges)
1/2 cup water
1/4 cup honey
1 tsp pink peppercorns
3 cardamom pods, crushed
2 blood oranges, supremed
chopped pistachios, for serving

1. To prepare the panna cotta: In a small bowl add the 3/4 cup blood orange juice and sprinkle the gelatin on top to let it bloom. Set aside.

2. In a small saucepan set over medium low heat, combine the sugar, milk, heavy cream, vanilla seeds and pot, cardamom, zest and salt. Stir just until the sugar is fully dissolved, taking care not to heat the milk too much. Remove from the heat and stir in the yogurt. Remove the vanilla pod, squeezing out any vanilla goodness inside and discard. Stir in the bloomed gelatin mixture, stirring until dissolved and no lumps remain. Pour the panna cotta mixture into individual mason jars or greased molds (if planning to unmold) and refrigerate for at least 2 hours, or until set.

3. To prepare the syrup: In a small saucepan combine the juice, water, honey, peppercorn and cardamom pods. Bring to a simmer and reduce by half. Allow it to cool to room temperature then use fine sieve to strain out the peppercorns and cardamom pots, reserving the syrup in a small bowl. Add the blood orange supremes to the syrup and refrigerate until needed.  

4. To serve: If unmolding, gently use a thin knife around the edges of your mold to loosen the panna cotta and unmold on your serving dish (otherwise serve directly from your jars.) Pour a few spoonfuls of syrup on top along with a couple orange supremes and garnish with chopped pistachios.

(inspired by and adapted from Yes, More Please!)

Monday, January 27, 2014

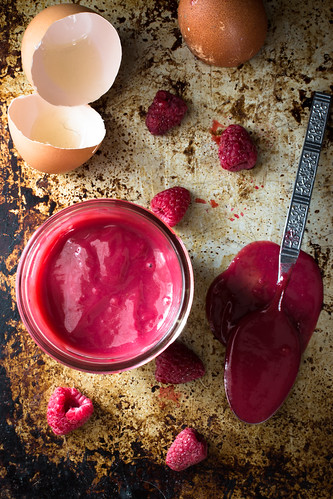
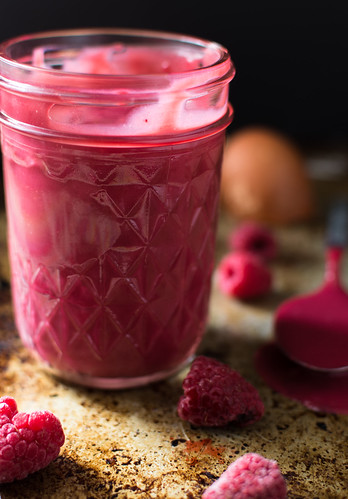
Raspberry Curd

Raspberry Curd

Like much of the country it's been extra cold and dreary here the past few weeks. This part of winter is always the hardest - a long stretch of not much to look forward to before Spring arrives, besides more cold and more snow of course. 

Warm and hearty comfort cooking makes the long nights slightly more bearable, but I've been craving something bright and summery to lift my spirits. After baking a couple batches of macarons I had just enough leftover egg yolks to create a luscious and tangy fruit curd. Berries always mean summer to me, so armed with some frozen fruit I set off to make some raspberry curd.

If you don't have some of last years' berries stored away in your freezer, frozen berries are easy to find in your grocery store, inexpensive and flavorful. This curd isn't as thick as a traditional lemon curd, but it's still spoonable and perfect to spread on scones and muffins, stir into yogurt or oatmeal, flavor buttercream and, of course, just eat with a spoon!

Raspberry Curd

Raspberry Curd
(makes about 2 cups)

12 oz frozen raspberries, fully thawed
1 stick (8 oz) butter
3/4 cup sugar
2 Tbsp fresh lemon juice
6 egg yolks
pinch of salt

1. Over medium heat melt the butter in a medium saucepan. Add the thawed berries and any accumulated juices, sugar, lemon juice, egg yolks and salt and whisk until well combined. Cook over medium heat, making sure to mash the berries and whisk frequently, until thickened, about 5-10 minutes. Pour the mixture through a fine mesh sieve, pressing on the solids to extract as much liquid as possible and collecting it in a small bowl. Discard the solids and mix the liquid mixture until uniform. Cover with plastic wrap placing the plastic wrap directly on the top of the liquid and refrigerate until cool. Store in fridge in an airtight container.

Wednesday, January 15, 2014

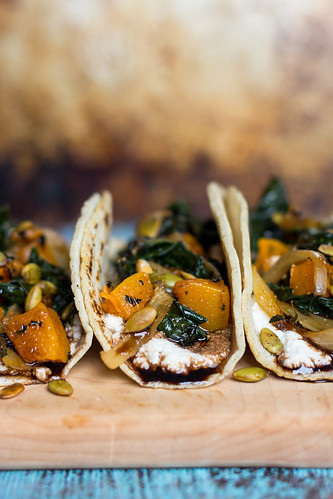
Pumpkin, charred kale & onion tacos

Pumpkin, charred onion & kale tacos

Back in November I went for a mini foodie tour of Philly. I indulged in much gelato from Capogiro, ice cream at The Franklin Fountain, and lots of cheese and other goodies from Reading Terminal Market. (Can you tell I like dairy?) But for me, the standout dish was the seasonal pickle special at Village Whiskey - pickled pumpkin and charred kale served with toasted sourdough and ricotta.

 It was so simple, but so magical! The sweet pumpkin paired with slightly bitter charred kale, the vinegar cutting through the richness of the ricotta, and the satisfying crunch of the toast. SO GOOD! I haven't stopped thinking about it!

Inspired by that dish I came up with these tacos to satisfy my craving. No need to pickle anything - the tang comes from a sweet balsamic drizzle. If you can't find a fresh pumpkin, use a more readily available squash - like butternut - or even a sweet potato.


Pumpkin, charred kale & onion tacos
with ricotta and balsamic drizzle

1/2 cup balsamic vinegar
2 Tbsp pure maple syrup
3 cups fresh pumpkin, peeled and cut into bite sized pieces
2 Tbsp olive oil, plus 1/2 tsp, divided
3/4 tsp smoked paprika
1 small bunch kale, stemmed, leaves coarsely chopped
1 yellow onion, sliced
1/4 cup roasted pepitas
salt & pepper
fresh whole milk ricotta

1. To make the balsamic drizzle, pour the balsamic vinegar and maple syrup into a small sauce pan. Bring to a boil then reduce heat to medium and let simmer until it has reduced by about 1/2 and has a slightly syrupy consistency, about 10 minutes. Remove from heat and set aside to cool.

2. Preheat oven to 425F. On a lightly oiled baking sheet toss the cubed pumpkin with 1 Tbsp olive oil, smoked paprika and season generously with salt and pepper. Spread pumpkin evenly over the baking sheet and roast in the preheated oven, stirring occasionally, until pumpkin is soft and brown in spots, about 20-30 minutes. Transfer pumpkin to a large bowl and set aside.

3. Set your oven to broil and set an oven rack about 3 inches below your broiler. Toss the kale leaves onto the same baking sheet you used for the pumpkin. Massage 1 Tbsp of oil into the kale leaves and season lightly with salt. Spread evening over the pan and then top the kale with slices of onion. Place kale and onion into the oven and broil for about 5 minutes, or until the onion is starting to brown and the kale is blackened in spots. Remove from oven and transfer to the bowl with the pumpkin. Gently mix the pumpkin, kale and onions together and season to taste with salt and pepper. 

4. To assemble, spread a dollop of fresh ricotta onto a corn tortilla, top with the pumpkin and kale mixture, a drizzle of the balsamic glaze and sprinkling of roasted pepitas. 

Wednesday, January 1, 2014

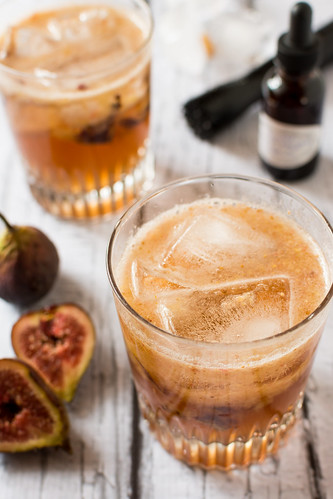
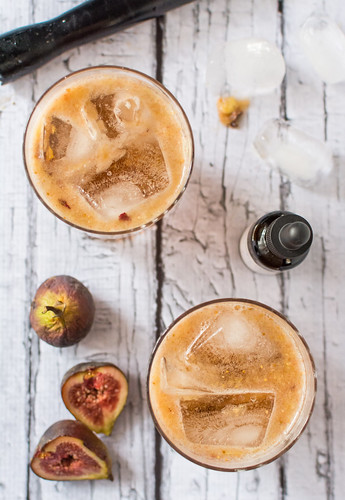
Figgy Maple Bourbon Fizz

Figgy Maple Bourbon Fizz

Happy 2014! I hope the holidays treated you well and you're not too tired of the kitchen. I somehow managed to come out of it alive, albeit with a few pounds to spare!

Despite all the dietary resolutions floating around out there today, I'm not giving you a recipe for kale or spaghetti squash. That's not to say I'm not reining it in around here too, but I feel like you probably need a little bourbon in your life all year long. 

A few weeks before the holidays I was gifted (well, swapped!) a couple different homemade bitters from Kate at Snowflake Kitchen which inspired me to come up with something a little different to mix up and sip on. The vanilla maple coconut bitters included in this recipe are super yummy and add just a little extra suntin'-suntin' to the overall flavor of this drink, but if you don't have the time to whip up your own you can swap them out for another variety of bitters. And if finding fresh figs at your local grocery store is hit or miss around you as it often is for me, you can make the fig-infused bourbon with dried figs, omit the fresh fig in the muddling step and still have a lovely figgy cocktail!

Figgy Maple Bourbon Fizz

Figgy Maple Bourbon Fizz
(makes 2 cocktails)

Fig-infused bourbon:
fresh figs, halved
bourbon
mason jar, or other clean glass vessel with cover

1. Fill your mason jar, or other container, halfway with fresh figs. Top off with bourbon, cover, and let sit for 5-7 days, giving it a gentle swirl once a day or so. Once infused, strain the bourbon through a sieve (reserve the figs for another use like a boozy jam) and pour bourbon into another clean jar for storage.

Figgy Maple Bourbon Fizz:
1 fresh fig, halved
2 tsp pure maple syrup, the darker the better
squeeze fresh lemon juice
few dashes vanilla coconut maple bitters, or angostura bitters
3 oz fig-infused bourbon
ginger beer

1. Divide the fig between 2 old fashioned glasses. To each glass add 1 tsp maple syrup, small squeeze of fresh lemon juice and a couple dashes of bitters. Muddle ingredients in each glass until well incorporated. Fill glasses with ice, pour 1 1/2 oz of the fig infused bourbon over each and then top with ginger beer. Give a quick stir and enjoy!

Tuesday, December 17, 2013

Sugar & Spice Cookies

Sugar & Spice Cookies

So like, things are getting a little crazy around here. I'm running out of room in the freezer for cookies. And pierogi. But mostly cookies. 

I'm probably making too many cookies for the holidays (I can't believe I just said that), but there are certain cookies that just make it feel like Christmas time to me. My mom always used to make these sugar & spice cookies around this time of year. They were special "Christmas time" cookies in my little brain, and I don't remember eating them any other time of the year. Now my Christmas cookie baking marathons just don't feel complete without them!

They're good too. Real good. Slightly crisp on the outside, but chewy in the middle. There's depth from the molasses, and just the right amount of spice without getting too gingerbready. The recipe calls for shortening, but I have used butter with good results as well - just slightly crisper and the cookie will spread more. The dusting of powdered sugar is totally not optional, by the way. It's Christmas, ok? Everyone needs a little snow in their life! 

Sugar & Spice Cookies

Sugar & Spice Cookies
(makes about 5 dozen)

1 1/2 cups shortening, room temperature
2 cups sugar
2 eggs
1/2 cup molasses
4 cups all purpose flour
4 tsp baking soda
1 tsp salt
2 tsp cinnamon
1 1/2 tsp ground cloves
1 1/2 tsp ground ginger
powdered sugar, for dusting

1. Preheat oven to 375F. Line 2 baking sheets with parchment paper. Position your oven racks in the top and bottom thirds of your oven.

2.  In a large bowl, sift together the flour, baking soda, salt, cinnamon, cloves and ginger. set aside.

3. In the bowl of a stand mixer cream together the shortening and sugar with the paddle attachment until light and fluffy. Beat in the eggs one at a time, and then the molasses until well combined. Add the dry ingredients and mix until a uniform dough forms . Be sure to scrape the sides and the bottom of the bowl while mixing - this is a large amount of stiff dough and dry ingredients like to pool at the bottom of the mixer.

4. Roll the dough into small bowls about the size of a tablespoon and place on the prepared baking sheets about 2 inches apart. Bake for 10-12 minutes, switching the baking sheets between racks halfway through, or until the cookies are puffed and slightly cracked all over. Remove from oven and let cool on the baking sheet for about 2 minutes before cooling completely on wire racks. Repeat with the remaining dough. Once the cookies are completely cool, dust lightly with powdered sugar.

Wednesday, December 11, 2013

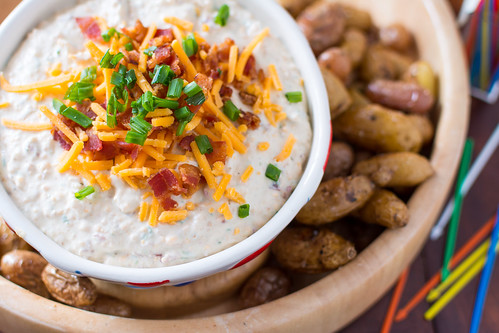
Loaded Baked Potato Dip with crispy fingerling potatoes

DSC_5880.jpg

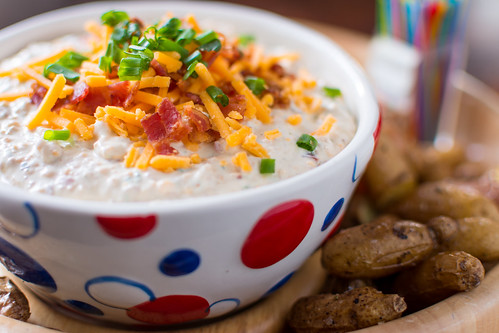
I thought about saving this one for the NFL playoffs or the Superbowl, but then I realized you all are probably doing a lot of partying these days. What with all the holiday family gatherings, work parties, Christmas and New Year's Eve. Maybe a super easy, crowd pleasing dip would come in handy right about now?

This dip has all the toppings you love on a baked potato - sour cream, cheese, bacon, some chives. Only this way you get a higher toppings to potato ratio which is all anyone really wants, right? If you're traveling with this then just serve it with some thick-cut potato chips, but if you're home and have the oven space, it totally deserves to be kicked up a notch with creamy, crispy-skinned fingerling potatoes. Little mini baked potato dippers! Just make sure to have some pronged toothpicks or forks so you can get a good grip on the little buggers!

DSC_5883.jpg

Loaded Baked Potato Dip 
with crispy fingerling potatoes

For the dip:
12 slices thick cut smoked bacon, or about 12 oz, cooked until crisp
1 cup sour cream
1 cup greek yogurt
2 cups sharp cheddar cheese, shredded
1/4-1/3 cup chopped fresh chives
LOTS of black pepper (if that's your thing)

For the fingerling potatoes:
1 1/2 lbs of the smallest fingerling potatoes you can find
1-2 Tbsp olive oil
salt & pepper

1. In the bowl of a food processor add the cooked bacon (broken into pieces), sour cream, yogurt, cheddar, chives and a few grinds of black pepper. Pulse 5-10 times, or until the dip is well combined but still slightly chunky. Cover and chill in the fridge for at least 30 minutes to an hour. (If you chill it for much more than this, bring it back to room temperature for about 30 minutes before serving)

2. While your dip is chilling, roast the potatoes. Preheat oven to 425F. Clean up the potatoes and dry well. If the potatoes are on the larger side, cut in half, or otherwise bite sized pieces. In a bowl, toss the potatoes with 1-2 Tbsp olive oil until well coated. Spread evenly on a greased baking sheet, or 2 baking sheets if needed, and sprinkle with salt. Bake for 20-25 minutes, or until potatoes are soft on the inside and the skin is slightly crispy. Serve warm with dip.

Wednesday, December 4, 2013

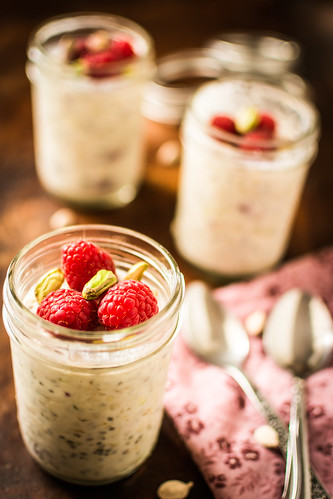
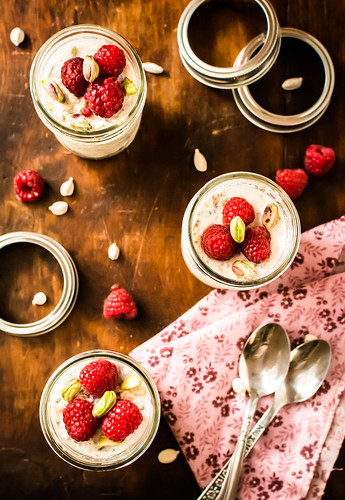
Raspberry, Pistachio and Cardamom Overnight Oats

raspberry Cardamom Overnight Oats

More breakfast recipes! Except this one is a lazy man's breakfast recipe - throw everything in a jar, give it a stir, throw it in the fridge, and forget about it until the morning. Perfect for me since I am decidedly NOT a morning person.

I have to dissent from the majority though and say that I don't find oatmeal all that filling. I'm convinced this is just something people say to make you feel bad about your desire to throw back a plate of eggs and bacon. For this reason I tried to bolster the protein and fat content of these oats with the addition of greek yogurt and nuts to make the oats a little heartier. They make for a great breakfast that's on the lighter side, or a tasty and nutritious snack.

This recipe is also very customizable, so experiment with spices, sweeteners, fruits and liquids to suit your tastes. They will keep in the fridge for several days, so double or triple the recipe as needed.

Raspberry Cardamom Overnight Oats

Raspberry, Pistachio and Cardamom Overnight Oats
(makes two 1/2 pint servings)


1/2 cup old-fashioned oats
1/2 cup greek yogurt
1/2 cup milk
2 tsp chia seeds
2 Tbsp honey
1/4 tsp ground cardamom
2-4 Tbsp chopped shelled pistachios
1/3-1/2 cup fresh raspberries, or enough to fill your jars

1. In a small bowl, stir all ingredients until well incorporated, crushing some of the raspberries as you stir. Distribute equally between two 1/2 pint jars, or other 1 cup containers, cover and refrigerate overnight. Serve chilled or dump into a bowl and microwave for 30-60 seconds. 

Wednesday, November 27, 2013

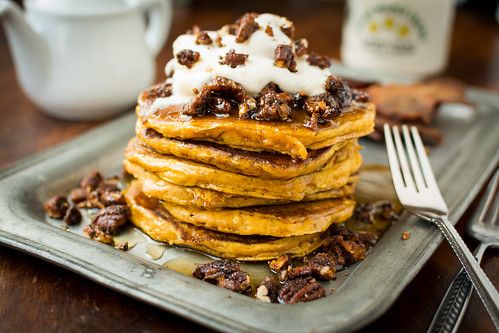
Brown Butter Pumpkin Pancakes with Maple Bourbon Bacon Pecans

Brown Butter Pumpkin Pancakes

If you're cooking Thanksgiving dinner for your family, then I know that the last thing you're probably thinking about right now is pumpkin pancakes. It's more likely that you're still trying to figure out exactly how long that turkey is going to take, or playing tetris with said turkey and the 10 different casserole dishes in your fridge, or maybe you're busy ironing napkins and thinking to yourself "when did I become this person?" 

But perhaps if you're choosing R&R over being trampled in a riot at Walmart on Black Friday, and you've had a couple days full of turkey sandwiches and soup, you'd like to use up the leftover pumpkin puree from that pumpkin pie and make what amounts to dessert for breakfast. Or, if you're really lucky, you have an awesome family member who wants to treat you to it!

These aren't your average pancakes - they're super fluffy pancakes flavored with pumpkin and warm spices, laced with brown butter and topped with cinnamon whipped cream and sweet, salty, bacon-y pecans. Yeah, they're good. This recipe makes a big family sized portion of pancakes, but it's easy enough to half the recipe. They are surprisingly tasty even after being reheated, though!

Brown Butter Pumpkin Pancakes

Brown Butter Pumpkin Pancakes
with Maple Bourbon Bacon Pecans

For the pecans:
1 egg white
3 Tbsp bourbon
1 Tbsp vanilla extract
1/4 cup maple sugar
1/4 cup light brown sugar
3/4 tsp cinnamon
1/4 tsp kosher salt
3 strips thick-cut bacon, cooked until crisp and finely chopped
3 cups raw pecans, coarsely chopped

For the pancakes:
1 stick butter (1/2 cup), cut into several slices
2 1/2 cups all purpose flour
4 Tbsp sugar
4 tsp baking powder
1 tsp cinnamon
1 tsp ginger
1 tsp nutmeg
1/4 tsp clove
1 tsp kosher salt
2 cup milk (room temp)
3/4 cup pumpkin puree (room temp)
2 eggs (room temp)

1 cup heavy cream
1/2 tsp cinnamon
1 Tbsp powdered sugar
pure maple syrup, for serving

1. For the pecans: Preheat oven to 350F. Line a large baking sheet with parchment.  In a large bowl, whisk egg white until foamy, then whisk in the bourbon, vanilla, maple sugar, brown sugar, cinnamon and salt. Add the pecans and bacon and toss to coat. Spread the nuts in an even layer on the prepared pan and bake int he preheated oven for 15-20 minutes, stirring occasionally. Cool for at least 10 minutes before removing from the pan and setting aside.

2. For the pancakes: Heat a small skillet over medium heat. Add the sliced stick of butter, whisking frequently. Continue to cook the butter and wait for it to foam up and then subside. Watch for small brown specks to form in the butter - it should smell toasty and nutty. Once it reaches this point remove from the heat and measure out 4 Tablespoons of the melted butter and place into a medium bowl. Pour the remaining butter into a small vessel and stick in the fridge or freezer so it can harden up for serving.

3. To the medium bowl with the 4 Tablespoons of brown butter, add the milk, pumpkin puree and eggs and whisk until well blended (it helps if these ingredients are at room temperature.) In a separate bowl, whisk together the flour, sugar, baking powder, cinnamon, ginger, nutmeg, clove and salt. Gently, but quickly, mix the wet ingredients into the flour mixture. 

4. Heat a heavy frying pan or griddle over medium heat and lightly grease. The pan is ready when a drop of water skitters across the surface of the pan. Drop 1/4 cups of pancake batter onto the pan and cook on one side until bubbles begin to form on the surface, about 2 minutes or so. Flip over and cook on the other side for another 2 minutes, or until golden brown. 

5. To serve, whip the heavy cream, 1/2 tsp cinnamon and powdered sugar until soft peaks form. Top the pancakes with a bit of the cooled brown butter from the fridge/freezer, a drizzle of maple syrup, a dollop of whipped cream and prepared pecans.

Thursday, November 21, 2013

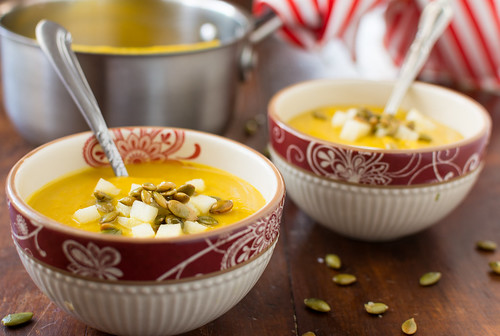
Kabocha Squash and Celeriac Soup with Duckfat-Roasted Pepitas

Kabocha Squash and Celeriac soup

I'm about to embark on the utter madness that occurs in my kitchen between Thanksgiving and Christmas. In a whirlwind I go into the wee hours of the morning for a month and half making dishes for family gatherings, a feast for Friendsgiving, and candies and cookies like a good little Christmas elf. It's over in a flash and an explosion of wrapping paper, and all I'm left with is a giant pile of dishes!

Without fail, after a month of nonstop crazy, I get sick right before Christmas and go into hibernation until New Year's. You'd think I'd learn to slow down a bit, but I never do. MUST. BAKE. ALL. THE. THINGS!!!

Kabocha Squash and Celeriac soup

Until that happens though, I will be busy playing and experimenting in the kitchen. And even with all the Christmas lights going up around me, my focus is still on Thanksgiving. Give the day its due, people! What's the rush with Christmas decor up in the stores in August and Halloween stuff gone off the shelves before we even get there?! Thanksgiving is a glorious day filled with gluttony and naps and football! What could be better??

And here's another thing, I feel like soup doesn't get its rightful place on the Thanksgiving menu. I can't think of anything more comforting and homey than a warm bowl of soup shared with family and friends. Not a large bowl, or a rich bowl, (you do need to fit in all those mashed potatoes and second servings of stuffing, after all) but a small, well-seasoned bowl of soup made from simple, seasonal ingredients. Now that's the way to start Thanksgiving in my opinion.

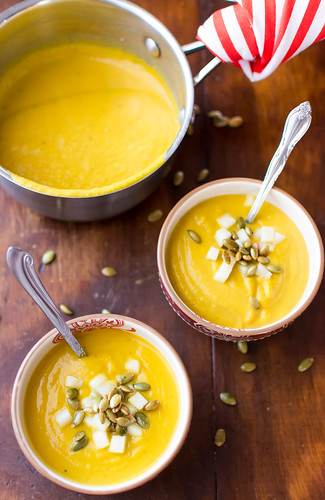
This kabocha squash and celeriac soup hits all the marks. It's slightly sweet and super creamy, but still light thanks to the low starch content of the celeriac. Top that with some savory pepitas roasted in duck fat (or bacon fat!) and some crisp apples, and it's perfection.

Kabocha Squash and Celeriac soup

Kabocha Squash and Celeriac Soup
with Duckfat Roasted Pepitas
(makes 8-10 cups)

For the soup:
1 medium kabocha squash, about 2-3lbs, peeled, seeded, and flesh cut into 1 inch pieces
1 large bulb celeriac, peeled and cut into 1 inch pieces
2 Tbsp olive oil
2 Tbsp butter
1 large shallot, minced
2 cloves garlic, minced
1/2 tsp garam masala
1/4 tsp cinnamon
3 cups chicken stock
1 cup apple cider
2 sprigs thyme
1/2 cup cream (optional)
salt & pepper, to taste
1 tart apple, peeled, cored and finely diced (for garnish)

For the pepitas:
2 tsp duck fat, melted
1/2 cup pepitas 
1/2 tsp truffle salt, or kosher salt


1. For the soup: Preheat oven to 425F. Toss the squash and celeriac with olive oil and spread in an even layer on a baking sheet. Season well with salt and pepper and bake in the preheated oven, stirring occasionally, until the vegetables are lightly brown and soft, about 25 minutes. Remove from the oven and set aside.

2. While the squash and celeriac are roasting, melt the butter in a large heavy bottomed pot over medium heat. Add the shallots and cook until soft, about 5 minutes. Add the garlic, stir, and cook just until fragrant, about a minute. Add the roasted vegetables, garam masala and cinnamon, stir and cook for a minute or two. Add the chicken stock, apple cider and thyme to the pot and bring to a boil. Reduce heat to a simmer and cook for 20-30 minutes. 

3. In batches, puree the soup in a blender until very smooth and creamy. Add additional stock to thin if needed. Pour the pureed soup back into a pot and stir in the cream if using. Taste for seasoning and add salt as needed. Serve soup topped with diced apples and warm pepitas. (If you're making the soup in advance, don't add the cream until you're ready to serve.)

4. For the pepitas: Preheat oven to 350F. Toss the pepitas with the duck fat and 1/2 of the salt. Spread on a baking sheet lined with parchment and bake for 10-15 minutes, stirring occasionally, until just starting to brown. Remove from oven and sprinkle with the remaining 1/2 of the salt. 

Tuesday, November 19, 2013

Korean Beef Tacos with cabbage and kohlrabi slaw

Korean Beef Tacos

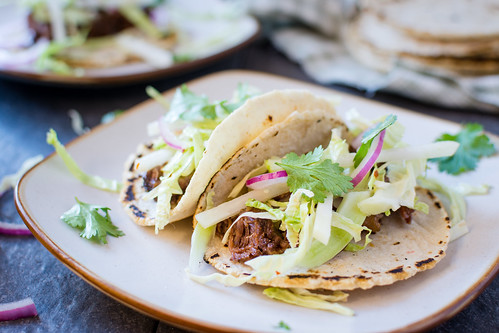
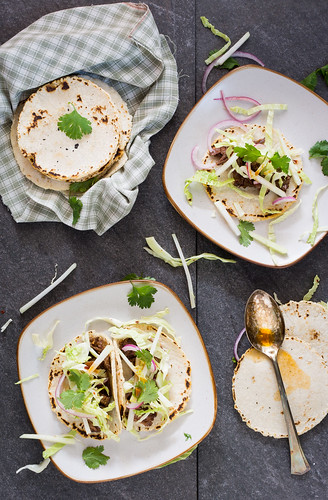
Would you like something to fill those homemade corn tortillas with? I have the perfect, easy slow cooker recipe for you!

I know you still might be thinking that making your own tortillas is too much work and not worth the trouble. Or maybe you think it's a weekend project and not something you could do on a weeknight. This recipe will take care of itself after throwing the ingredients in your slow cooker and slicing a couple veggies so that all you have to worry about is the 20 minutes it will take you to cook up your tortillas. 

You'll be rewarded with soft, warm tortillas topped with savory, melt-in-your-mouth beef and some bright, crunchy quick-pickled veggies. An impressive meal for any night of the week!

Korean Beef Tacos

Korean Beef Tacos

For the cabbage & kohlrabi slaw:
2 cups cabbage, cored and thinly sliced
1 1/2 cups kohlrabi, cut into matchsticks
1/2 cup thinly sliced red onion
4 Tbsp rice vinegar
1 Tbsp sugar
1/2 tsp salt
1/4 tsp red pepper flakes


For the beef:
3lb beef shank, or short ribs
1 Tbsp canola oil
10oz bottle lower sodium soy sauce
1 cup water
1/2 cup sake
2 scallions, chopped
3 cloves garlic, minced
1-inch piece ginger, minced
1 stalk lemongrass, minced (discard the thick outer leaves)
2 Tbsp sriracha
3 Tbsp rice vinegar
1 Tbsp sesame oil
1 Tbsp fish sauce
1/2 cup dark brown sugar

For the finished tacos:
fresh cilantro
extra sriracha

1. For the slaw: Mix the rice vinegar, sugar, salt and red pepper flakes in a large bowl until sugar is dissolved. Add the sliced cabbage, kohlrabi and red onions and toss until well coated. Cover and refrigerate for at least 30 minutes, tossing a couple times. Can be made the day before.

2. For the beef: In a large pan (or if you have a slow cooker bowl designed to go over direct heat, use that) heat the canola oil over medium-high heat. Season the beef with salt and pepper. Sear on all sides until golden brown and set aside on a plate. 

3. Add all of the remaining ingredients for the beef to the bowl of the slow cooker and mix well. Add the beef and submerge in the liquid. Cook on low for 8 hours, or until the beef is fall apart tender. Remove the meat from the slow cooker and shred or break into chunks, reserving some of the cooking liquid, skimming the fat, to drizzle on the final tacos if desired. 

4. Pile the beef on the tortillas, drizzle on a bit of the reserved cooking liquid, top with the cabbage and kohlrabi slaw, cilantro and sriracha if desired. Enjoy! 
Tuesday, November 12, 2013

Soft Corn Tortillas

Soft Corn Tortillas

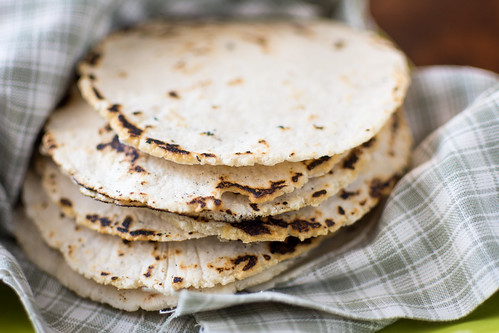
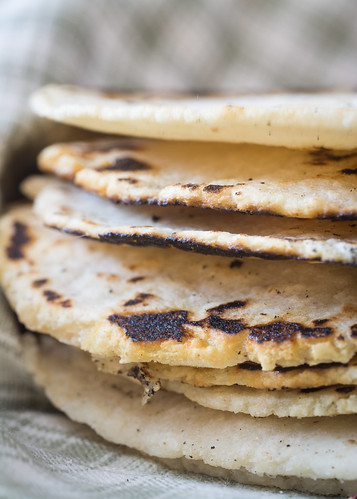
I feel like it's almost cheating passing this off as a blog post. These corn tortillas are soooo easy to make that it is barely even a recipe. But I feel like you really need to know just how easy it is to make your own delicious, fresh tortillas because it will change your life.

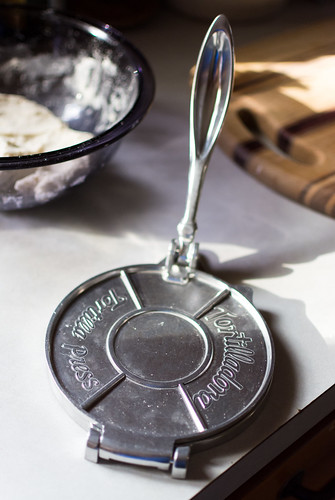
Tortilla Press

That right there is some of the best $20 I've spent in my kitchen. It has easily paid for itself by no longer buying the packaged tortillas in the grocery store, and I've been rewarded with way tastier tortillas. Seriously, you won't believe the difference between a fresh tortilla and the dried out junk that has been sitting in the fridge at the grocery store for who knows how long. They are lighter, softer and far more flavorful. They will take your tacos to the next level!

You should be able to find a bag of Masa Harina, a corn flour that has been treated with water and lime, in the aisle of your grocery store with other Mexican or Spanish foods. And while you can roll these out by hand or press them with a plate, I strongly recommend a tortilla press. They are inexpensive, make tortillas a breeze to put together, and I guarantee you will get a ton of use out of it once you give these tortillas a try!

Soft Corn Tortillas

Soft Corn Tortillas

(Makes about 8 small tortillas)
1 cup masa harina
about 3/4 cup warm water
1/2 tsp salt

1. Preheat a cast iron pan or other heavy bottomed nonstick skillet on medium-high heat. Line the inside of your tortilla press with plastic wrap for easy cleanup. Set a small pot with a cover nearby.

2. In a bowl mix the masa harina and salt together. Start by adding 1/2 cup of the warm water and mixing well. If it still looks dry, add more water and knead. The dough should have a consistency such that when you roll a ball of it in your hands and flatten it, the dough neither sticks to your hand or cracks around the edges. If it's sticky, add more masa. If it cracks, add more water. Once it has reached the proper consistency, roll the dough into balls about the size of a golf ball and cover with plastic wrap while you wait to press and cook them.

3. Use your tortilla press to press each ball of dough then carefully peel it off the plastic wrap and add to the preheated pan. Cook on each side for about 45 seconds. You should see it puff up in areas and get charred in places. This is what gives it good flavor. Remove from the pan and place in the covered pot you have nearby. Keep covered while you cook all the tortillas. Serve warm!

Tuesday, November 5, 2013

Orecchiette with Butternut Squash, Brussels Sprouts and Sausage

Orecchiette with butternut squash, brussel sprouts and sausage

I never really ate brussels sprouts as a kid. Not because I didn't like them, but because I don't remember ever being introduced to them. See, both my parents had been burned by mushy, overcooked, boiled brussels sprouts as kids and never wanted to try them again as adults. And so, the great Brussels Sprout Hatred was almost perpetuated for another generation.

Finally, at some point in my young adulthood, despite all the horror stories I had heard, I decided to be so brave and had brussels sprouts cooked with bacon and onion at a friend's house. Now, that's the way to be introduced to brussels sprouts! Brussels&Bacon! As it turns out, they are pretty delicious and I've been hooked ever since.

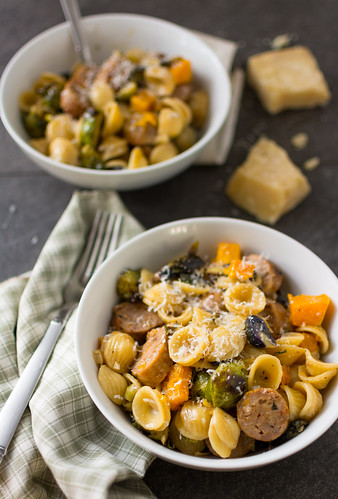
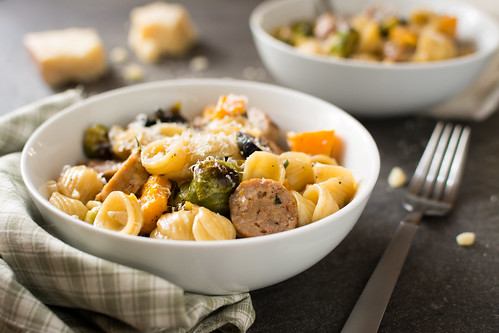
Since then I've converted many a brussels sprout hater with roasted sprouts, raw sprout salads, and of course, the tried and true brussels&bacon! Now I think I have a new dish that can have much of the same effect - creamy, cheesy pasta with sweet squash, spicy sausage, and of course, brussels sprouts! Give a whirl and see if you can change some minds!

Orecchiette with butternut squash, brussel sprouts and sausage

Orecchiette with Butternut Squash, Brussels Sprouts and Sausage

1lb orecchiette pasta
3/4 lb butternut squash, peeled and cubed into 1/2 inch pieces
1/2 lb brussels sprouts, halved
3 Tbsp olive oil, divided
1lb hot italian sausage links, about 4 links
1 large leek, white and light green only, thinly sliced
1 clove garlic, finely minced
1 Tbsp butter
1/4 cup apple cider
4 oz Mystic Cheese Company Melville, or marscarpone
1/3 cup parmigiano regiano, grated, plus more for serving
2 Tbsp sage, chopped
salt & pepper, to taste

1. Preheat oven to 425F. Toss the squash and brussels sprouts with 2 Tablespoons olive oil and season liberally with salt and pepper. Spread in an even layer on a baking sheet and bake in the preheated oven for 20-25 minutes, or until squash is tender and vegetables are beginning to brown. Set aside.

2. While the vegetables are roasting, in a large pot heat 1 Tablespoon olive oil over medium heat. Add the sausage links and cook, browning all sides, until cooked through, about 15 minutes. Move cooked sausage to a plate and reduce heat to medium-low.

3. Cook your pasta in salted water according to package instructions for al dente. Reserve 1 cup pasta water before draining.

3. While the pasta is cooking, add the butter to the same pot you cooked the sausage. Add the sliced leek and a pinch of salt and cook on medium low until soft, about 10 minutes. Add the apple cider and continue to cook, scraping up any brown bits from the bottom of the pan, until all liquid is evaporated. Add the garlic and stir, cooking just until fragrant. 

4. Add the cooked pasta to the pot with the leeks, then add the Melville or marscarpone and half the reserved pasta water and stir until all the cheese is melted. Slice the cooked sausage and add that, the roasted squash and brussels sprouts, parmigiano, sage, remaining 1/2 cup pasta water and salt & pepper, to taste. Toss gently until well combined. Serve with extra grated parmigiano.

Thursday, October 31, 2013

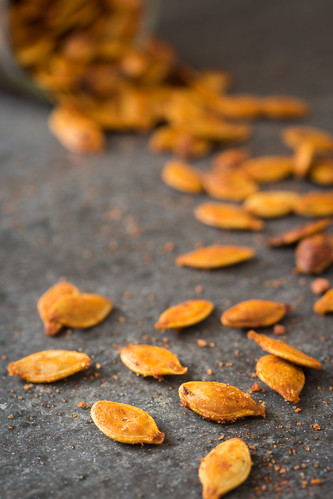
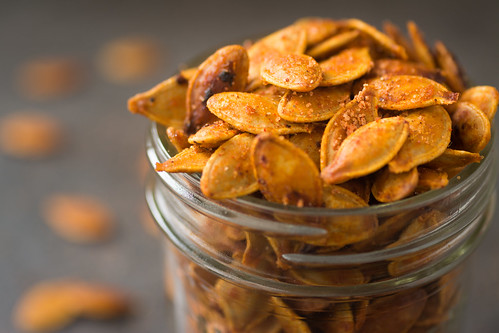
Maple Sriracha Pumpkin Seeds

Maple Sriracha Pumpkin Seeds

Have you carved your pumpkin yet? Maybe you're a last minute pumpkin carver. That's ok too. That means you can make these tasty seeds NOW! 

Maybe you already carved your pumpkin a week ago. Maybe it's already rotting out on your doorstep. Maybe it's going to sit there now until the last of the snow melts in the spring and you have to scoop it up with a shovel. I mean, I've totally never done that or anything... It's ok if you have. I won't judge.

Good news is, if you've already carved your pumpkin and don't have any seeds, you can still make these! You can roast up the seeds from any winter squash you cut up this fall. I bet you didn't know that! If you did, then high five!

These seeds are sweet, spicy, slightly smokey and totally addictive. I made these when it was already dark out and had to save my photos for the morning, so I limited myself to a handful. It was torture. Don't do that to yourself, just eat them hot out of the oven!

Maple Sriracha Pumpkin Seeds

Maple Sriracha Pumpkin Seeds

1 1/2 cups pumpkin or any winter squash seeds, cleaned of stringy squash guts
1 Tbsp bacon fat, melted (or olive oil)
1 Tbsp sriracha
1 Tbsp pure maple syrup
1 tsp smoked salt, or kosher salt

1. Line a baking sheet with parchment or nonstick foil. Preheat oven to 325F.

2. Bring a pot of water to a boil and add a good little handful of salt. Add the cleaned pumpkin seeds to the pot and boil for about 8 minutes. Drain and pat dry with paper towels. It's ok if they're a little sticky, they don't need to be bone dry.

3. Add the boiled seeds to a small bowl and add the fat, sriracha, and maple syrup. Stir until well combined. Sprinkle on the salt and toss well. Spread in an even layer on the prepared baking sheet and bake in the preheated oven for 25-30 minutes, stirring frequently, or until they are golden brown. Sprinkle with a little extra salt if desired and dig in!

Maple Sriracha Pumpkin Seeds

Sunday, October 27, 2013

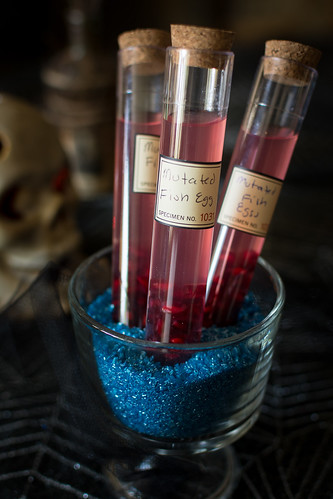
Raspberry-Apple Moonshine "Fish Egg" Shooters

Raspberry-Apple Moonshine "Fish Egg" Shooters

If you know me then you know October is my favorite month of the year. Of course the leaves are changing, the air is cool and crisp, there's apple picking and apple baking, but most importantly, there's Halloween!!

Now, I tend to take the more creepy & gory route on Halloween as opposed to cute. You're more likely to find me giggling with pure glee at the sight of zombies chowing down on someone's face than covering my eyes and hiding under a blanket. I can't say my mom didn't try... but I can't help it that Xenomorphs and the Crypt Keeper are more fun than nail polish and rom-coms!


Raspberry-Apple Moonshine "Fish Egg" Shooters

Anyway, what this all means is that I spend a lot of time thinking about and planning for Halloween. Besides decorations, a lot of the fun for me comes with thinking up creepy concoctions for my party menu. Most of the time you don't even need to make the food look extra scary, all you have to do is create a spooky ambiance at your table and give it an icky name - a hunk of gorgonzola with some prosciutto can become Moldy Cheese with Cured Epidermis, chili cheese dip can become Vomit, dates stuffed with cheese wrapped in bacon can be Roasted Roaches. You get the idea!


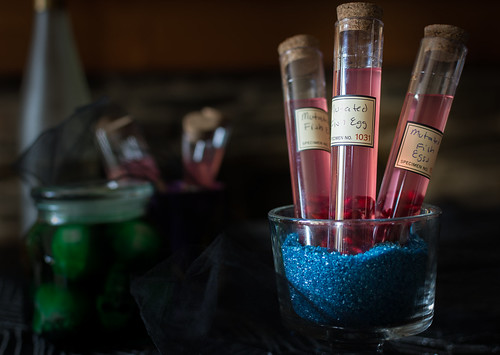
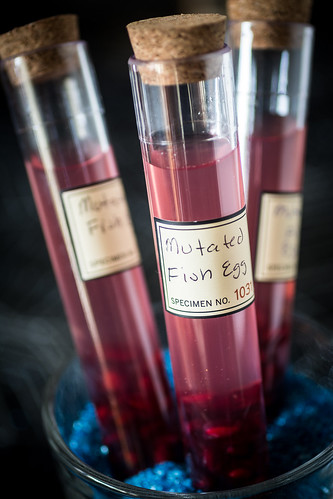
There's nothing scary about this Raspberry-Apple Moonshine cocktail, until you slap a "Mutated Fish Egg" label on it! It's delightfully light and fruity, and honestly would make a lovely drink any time of the year. Something about moonshine seems extra festive for Halloween - I'm not sure if it's because it has Moon in the name, or if it's because rednecks are scary. Either way, it makes a great mixer! I used Onyx Moonshine which is local to me, but with moonshine's popularity on the rise you shouldn't have a problem finding some in your neck of the woods!

Raspberry-Apple Moonshine "Fish Egg" Shooters

Raspberry-Apple Moonshine "Fish Egg" Shooters

2 parts Red Jacket Orchards Raspberry-Apple juice, or similar juice blend
1 part moonshine
1/2 part Elderflower liqueur
splash of fresh lime juice
fresh pomegranate arils

1. In a pitcher, combine apple juice blend, moonshine, elderflower liqueur, and lime juice, to taste. Chill. Add 1/2-2 tablespoons of pomegranate arils (depending on the size of your serving glass) to the bottom of your shot glasses, cocktail glasses, or test tubes. Pour the cocktail over the pomegranate seeds and serve.