People usually look at me like I'm crazy when I say I'm making sandwich bread from scratch, let alone homemade mozzarella, pasta, or in this case, butter. Sure, I know you can just go to the store and buy all that stuff, but what's the fun in that?! I like to make things interesting (read: complicated)!
Personally, I think it's fun, and can you really beat homemade? There's something about connecting with food on that level that makes me feel good. I think in our busy lives we forget where food really comes from. I just like to roll up my sleeves and get my hands dirty to remember.
Cultured butter isn't something you see too often in America. It's not that different from your ordinary slab of butter, except that it has a higher butterfat content and is "ripened" using happy little probiotic bacteria to intensify it's buttery flavor. Sounds good to me!
It's incredibly easy to make, and you really only need two things: high quality non-ultra pasteurized cream and yogurt.
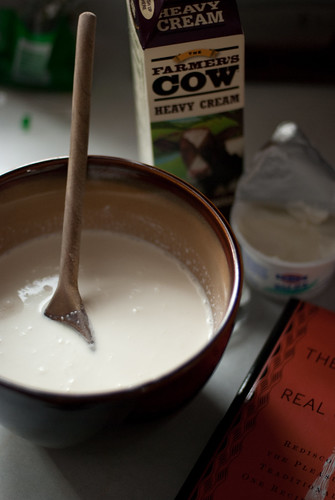
Depending on where you live, finding raw or non-ultra pasteurized cream may pose a slight challenge. Most cream you find in grocery stores is ultra pasteurized to extend shelf life, but it comes at the cost of flavor. If your normal grocery store only carries ultra pasteurized cream, you can search for a local dairy farm or health food store.
Here's what you do:
1. Get a large, super clean glass or ceramic bowl and pour in your cream, a quart or two (I found a quart made a bit under a pound for me.) Throw in a good dollop of plain yogurt (with live cultures.) The exact amount really isn't important, but say about 1/4-1/3 of a cup per quart. Give it all a good mix together.
2. Cover the bowl with a plate and stick it in a warm place overnight. Check on it the next day - if it looks extra thick and filmy then it's ready!
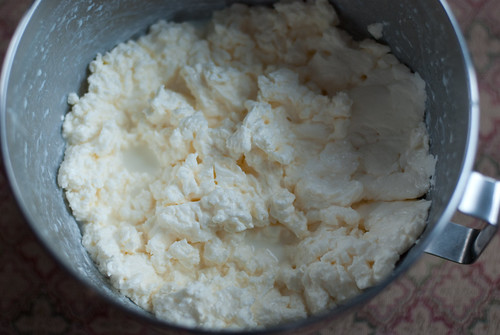
3. This next step you can do by hand if you want to be cool, or with a mixer. Beat the cream on high until stiff peaks form, then reduce your speed to LOW or you WILL get attacked by buttermilk. Shortly after the stiff peaks form, the butter will begin to separate from the buttermilk and you'll have something that looks like this:
4. Drain the buttermilk from the butter and reserve for something yummy. Biscuits, pancakes, or drink it straight!
5. Squish the butter in your hands just for fun cuz it's awesome. Now place the butter on a plate and chill for a while to let it firm up a bit before the next step.
6. Once the butter is firmed up a little, you will have to knead the remaining buttermilk out of it or it will spoil. You can do this in a bowl under running water - just squish the butter in your hands until the water runs clear. It sounds a little odd, but it's a lot of fun. There's something therapeutic about squeezing a pound of butter through your fingers, yup.
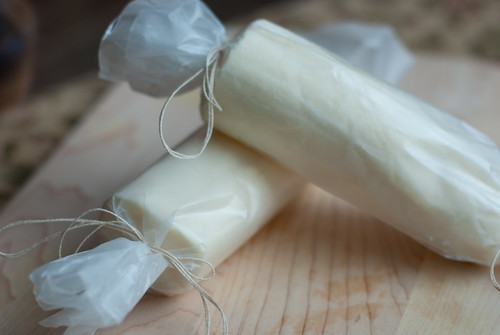
7. Drain the water from it well and it's ready! You can use it right away or wrap it up in plastic wrap/parchment paper and chill. If you let it age for a week or two, it will only get tastier.
Enjoy!!
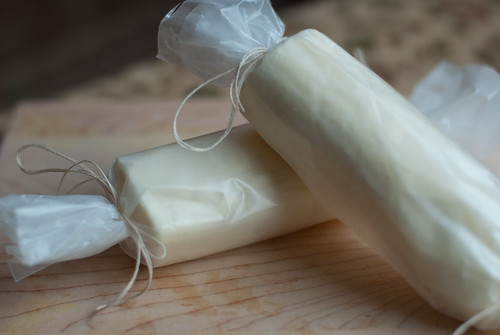
Photo of Lupin licking butter from your hands plz!
ReplyDeleteWow, good for you! I'll have to try it.
ReplyDeletehow much does this recipe make? i'm planning on making some but i'm not sure what i'll do if i end up with three lbs of butter haha
ReplyDeleteA quart of cream made a bit under a pound of butter for me and maybe 1 1/2 - 2 cups of buttermilk :)
ReplyDelete