
Yep, I'm late. I don't have an excuse other than I procrastinated and forgot what the reveal date was, oops! Clearly I need to add these things to my calendar.
The April 2011 Daring Bakers’ challenge was hosted by Evelyne of the blogCheap Ethnic Eatz. Evelyne chose to challenge everyone to make a maple mousse in an edible container. Prizes are being awarded to the most creative edible container and filling, so vote on your favorite from April 27th to May 27th at http://thedaringkitchen.com!
I did have a ton of fun doing this challenge and wish I had started earlier instead of pondering what kind of container I wanted to settle on making, especially since I ended up just making 4 different kinds anyway! I now have many plans for my mini muffin pan and an ice cream tasting party featuring edible bowls.

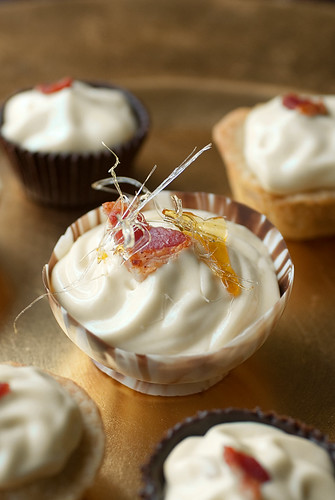
The spun sugar was especially fun to play with and I loved the delicate snap of sugar against the creamy mousse. I was a little impatient in taking my photos though, so my mousse was a bit soft and oozed out a little. After the mousse chills well it does firm up into a much more pipe-able consistency.
To make the mini spun sugar cups spray a mini muffin pan with cooking spray. Combine 1/4 cup sugar, 1/4 cup water, and 1/3 cup light corn syrup in a small saucepan and cook over medium high heat until the mixture reaches somewhere between 310F and 320F. Remove from the heat and and pour into a microwave safe bowl. Dip a fork into the sugar and quickly swirl the fork around inside the wells of the muffin pan. Be careful not to burn yourself! Once the sugar is evenly distributed, allow to cool for about 5 minutes and then gently remove from the pan without smashing them with your meaty fists. If you do smash some, just save them for garnish. Store in an airtight container.
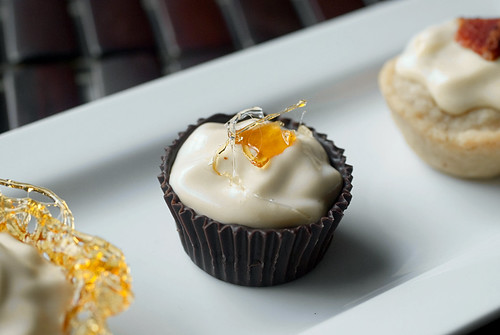
Playing with chocolate is fun too! Who would have thought? I made just a handful of the chocolate cups to experiment, so I'm not sure of the amount of chocolate you would need to yield a particular amount of cups, but here is my method. Begin by tempering your chocolate. Once it is ready, spoon a teaspoon of chocolate into a mini cupcake paper and use a spoon or your finger to spread the chocolate all around and up the sides of the paper. Chill in the fridge for 10-15 minutes, or until hard. Remove from the fridge and smear a little more chocolate inside the cup to reinforce it. Chill again for another 15 minutes, or until fully set up. Very gently remove the papers from the chocolate, and voila! Little bite sized cups to fill with whatever your heart deisres!

I wasn't satisfied with just one kind of chocolate cup though, oh no. I wanted to try a method I had seen for making chocolate bowls with balloons too! This is a really entertaining and easy little project. I think the hardest part was blowing up and tying the balloons. Turns out I'm really terrible at that.
To make these, pick up a package of water balloons. Blow them up to reach the desired size of your chocolate bowls and set aside. If you'd like to make this as easy as possible you can use candy melts, otherwise begin by tempering white and dark chocolate separately. You'll want a ratio of about 3 parts white chocolate to 1 part dark. Pour your tempered white chocolate into a medium bowl. Drizzle a bit of the dark chocolate artistically! over the top. Now the fun begins - dip your balloons into the (slightly cooled) chocolate and transfer them to a wax paper lined cookie sheet. Repeat with the desired number of balloons. Chill in the fridge until they harden, about 15 minutes.
Pierce a small hole in a balloon and slowly release the air. The balloon should naturally release from the chocolate. If it doesn't release, just gently pull away from the sides of the bowl. If there's a little hole on the bottom dab a bit of chocolate on it and chill again until it hardens. Use whatever chocolate is leftover to dip some strawberries into, yum!
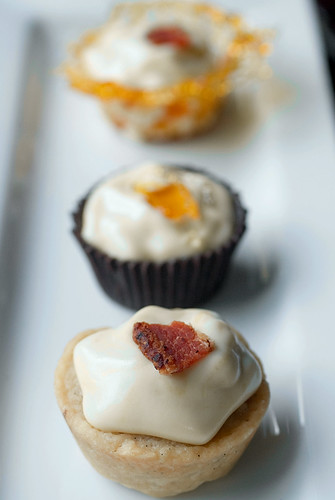
Last, but certainly not least, were the shortbread cups. They were definitely a hit! They would be a perfect dessert bite for a party since they are easy to make ahead and store. The vanilla bean and bourbon was a perfect compliment to the maple mousse and they would be amazing with some finely chopped nuts added as well.
Vanilla Bean Bourbon Shortbread Cups
(adapted from TheshoeboxKitchen)
3 1/2 cups all purpose flour
1/4 tsp salt
3 sticks unsalted butter, cubed and near room temperature
1/2 cup granulated sugar
1/2 cup confectioner's sugar
1 vanilla bean, split lengthwise
1 Tbsp pure vanilla extract
2 1/2 Tbsp good quality bourbon
1. Sift together the flour and salt in a medium bowl and set aside.
2. Cream the butter with the granulated and confectioner's sugars until light and fluffy. Scrape the vanilla bean into the butter and sugar mixture. Add the vanilla and bourbon. Mix on medium low until well combined. Slowly add the flour mixture while mixing on low, and stir until it comes together into a uniform ball of dough.
3. Shape the dough into a ball and then flatten into a disc. Wrap well in plastic wrap and set in the fridge to chill for about 2 hours.
4. Preheat the oven to 350F and spray a mini muffin pan with cooking spray. Remove the dough from the refrigerator and roll out to about 1/8-1/4 inch thickness.Cut into rounds using a circle cookie cutter that is slightly larger than the muffin tins are round. Push each cookie into a well of the muffin tin and smush it in a bit to conform to the shape. Bake for about 20 minutes, or until slightly golden around the edges. If they puff up too much, use a spoon to push the dough to the edge and reform the cup while it's still warm.
5. Allow to cool for about 10 minutes before removing from the tin and cooling completely on racks. Store in an airtight container and fill as desired!
What a beautiful collection of containers - worth being late for :-). I especially love the sugar one and the balloon one. I should try the balloon method sometimes too, but I'm really afraid of messing around with sugar, all my previous attempts have failed miserably :-). You're both brave and talented! Great job on this challenge!
ReplyDeleteWow! You did an incredible job with this challenge! Each container is as enticing as the next! I'd love to try the shortbread cups with fresh fruit. Lovely!
ReplyDeleteReally? Four different containers? Congratulations! They look beautiful and delicious. Love your photography!
ReplyDeleteThose cups all look incredible- and very tasty! I hadn't heard of the balloon method before, but I'll have to give it a try- what a gorgeous presentation!
ReplyDelete